Getting Started
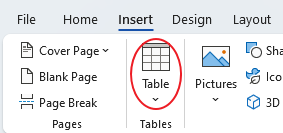
Go to the Insert tab and and add a Table that is 3×5…

Type in “Holidays” in the first row…

Add Seasons
Type the seasons in the first column…
Fall
Winter
Spring
Summer

Add Holidays
Copy the holidays for each season as shown below. CTRL+V to paste the text and Backspace to get rid of the extra lines.
Fall
Thanksgiving Day
Halloween
Remembrance Day
Winter
Christmas
Boxing Day
New Year's Day
Family Day
Spring
Easter
Mother's Day
Victoria Day
Summer
Father's Day
Canada Day
BC Day
Labor Day

Select all (CTRL+A) and click on Clear Formatting.
If you have extra spaces, click on the empty line and delete it.


Formatting Text
Default font
Select all the text (CTRL+A) and set to the font type to Juice ITC and size to 20


First Column
Select the first column and pump up to size 36 …


Page Heading
Select the page heading and set the size to 60 …


Adjust Table
Merge Row 1
Select the first row…

Go to the Table Layout tab and Merge Cells…


First Column Narrower
Hover over the edge of the 1st column – drag it to the left, make it narrower so it lines up with the left edge of the “Y”.

Spacing
View
Zoom out to 70% so you can see your entire page.

Bottom Margin
Hover over the Ruler where the margin stars (white/grey), when you get a 2-pointed arrow and it says Bottom Margin, pull down to the 1/2″ mark.


Paragraph Spacing
- Select all the text (CTRL+A)
- Go to Layout and set Paragraph Spacing before & after to 12 pt…


Bullets
- Select the 2nd column
- Make them a bulleted list


Symbol Bullets: Fall
Select the bullets in the Fall row…

- Go to the bullets drop-down menu and Define New Bullet…
- Choose Symbol…


In the window that opens, change the font type to Wingdings … and select the raindrop symbol, then click OK.

If you see the raindrop symbol in the preview window, click OK.

Your Fall list should now look like this…

Load other symbols:
Keep these bullets selected, and go back into Bullets > Define New Bullet > Symbol… a few times and load each symbol. Say OK to close the big window, and then OK to close the small window showing the Preview… repeat for each symbol.
Select the following symbols:
- sun
- snowflake
- flower


Then reapply the raindrop to the bullets, go back to Bullets drop-down and you will see it at the top in the recently loaded ones…

Symbol Bullets: Winter
Select the Winter list…

Use the bullet drop-down menu to choose the snowflake…


Symbol Bullets: Spring
Select the Spring list…

Use the bullet drop-down menu to choose the flower…


Symbol Bullets: Summer
Select the Summer list…

Use the bullet drop-down menu to choose the sun…


Space Between Bullets
- Select all the bullets
- Go to more Paragraph options.. in the window that opens up, uncheck the box for “Don’t add space…” so it’s empty (not shaded or checked).


You should have space between the bullets as well.


Pictures
Insert Pictures
- Right-click on the picture below and Copy Image
- Click in the empty cell in the 3rd column
- Paste using the button or keyboard shortcut CTRL+V.


When you’ve pasted them all in, you’ll have something like this…

Resize Pictures
Select the first picture (leaves)

Then go to the Picture Format tab … reduce the Height to 1″


Repeat for the other pictures, setting the Height to 1″. They should look like this…

Table Style
Select the table. Then go to the Table Design tab… go to the drop-down menu …

Select one of these styles (where the 1st row is darker and the other rows are alternating light/white).


Cell Alignment
Select the table again and go to the Table Layout tab … set alignment to middle-middle.


If you click off, this is your result.
